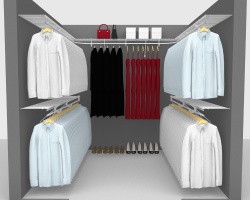
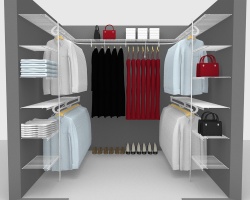
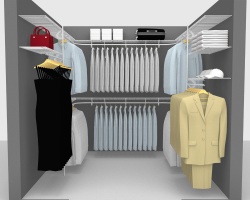
Pre-designed packages are a great value way to maximise your storage potential.
They include all of the shelving and hardware that you need to create a walk in wardrobe as illustrated in the design pictures above. Packages are delivered flat packed, with assembly instructions, labelled hardware, and informative diagrams for easy installation.
This package uses the ClosetMaid All Purpose style of shelving, along with SuperSlide hang rails with Fixed Mount Hardware. The package will include:
1 x Long hanging section for dresses and overcoats along the right hand side wall. Shelves will butt up to shelving on the rear wall and hanging section continues around the corner onto the rear wall using a SuperSlide corner hanger bar for seamless storage.
1 x Two tier hanging sections for short garments on left hand side wall. Top shelf will butt up against shelf already installed on rear wall to create seamless storage space. Hang bars will connect using SuperSlide corner hanger bars to create uninterrupted hanging space.
2 x Shoe racks on right hand side wall and rear wall. Rear shoe rack is up to 0,91m/ 3' wide and shoe rack on the right hand wall is up to 2,13m/ 7' wide. Together, shoe racks will store up to 12 - 15 pairs of shoes.
1 x Shelf stack of six shelves up to 0.6m/ 2' wide, suitable for flat and folded items. This is located on the rear wall.
If you have less than 2,44m/ 8' in either width/ length dimension of your room, then you can trim the shelving down to suit your exact measurements with a hacksaw or boltcutters. This will allow you to create the perfect fit for your walk in wardrobe.
You can choose the depth of your shelving from the options above, as well as the front wall availability which is required so that we can ensure we send you the correct hardware. This layout utilises at least three walls to fix to; two side walls and the rear wall of the room or enclosure. Ordinarily there will be a fourth/front wall (which has been made transparent in the pictures for viewing purposes), but sometimes the room/enclosure configuration means that there may not be a front wall at all, or there may only be a return wall to fix to at one side. So that we send you the correct components to install your walk in closet properly, please make sure that you select the correct option, explaining the configuration of the fourth/front wall, as viewed from the outside of the space working from left to right i.e.:
Wall - Wall will indicate that you have both front return walls at each side of the closet to fix to.
Wall - Open will indicate that you have a return wall at the left hand side, but an open area on the right hand side.
Open - Wall will indicate you are missing a wall/ cannot fix to the return wall on the left, but you have a return side wall to the right.
Open - Open will indicate that you you are missing both return walls/ cannot fix to either return wall.
You can view birds eye views of each of these options in the configuration tab above.
Bear in mind that once garments are on hangers they generally protrude between 51cm (20”) and 56cm (22”) from the wall.
If you are fixing onto the 'Front' wall please ensure you have a minimum return wall space of 14" (for 12" deep shelving) or 18" (for 16" deep shelving) to ensure there is enough room to install the hardware.
Use the images below to help you identify your wall configuration.
Images are a birds eye view of a "walk in" space.

Click below to view 12" (30.5cm) deep SuperSlide shelving instructions for walk in closets.

Click below to view 16" (40.6cm) deep SuperSlide shelving instructions for walk in closets.


.jpg)
.jpg)
.jpg)

.jpg)
.jpg)
.jpg)

.jpg)
.jpg)
.jpg)